How to Set Up a Free Data Science Environment on Google Cloud
Srini Kadamati
27 Mar 2018
•
6 min read

Whether you're running out of memory on your local machine or simply want your code to run faster on a more powerful machine, there are many benefits to doing data science on a cloud server. A cloud server is really just a computer, like the one you're using now, that's located elsewhere.
In this post, we'll walk through how to set up a data science environment on Google Cloud Platform (GCP). Google buys hundreds of thousands of individual computers, manages them in data centers that are located across the world using custom software, and offers these computers for rent. Because of the economy of scale that cloud hosting companies provide, individuals or teams can affordably access powerful computers with large amount of CPU and memory on demand.
Why use GCP?
When moving from a laptop / desktop setup to a cloud data science environment, it's important to think about what criteria is the most important to you. To work with larger data sets in pandas, for example, it's important to have a large amount of memory. To work with Spark to process large data sets, we need to rent a pool of many computers with a large amount of total memory to share the load.
Like other cloud providers, GCP contains many different products and services.
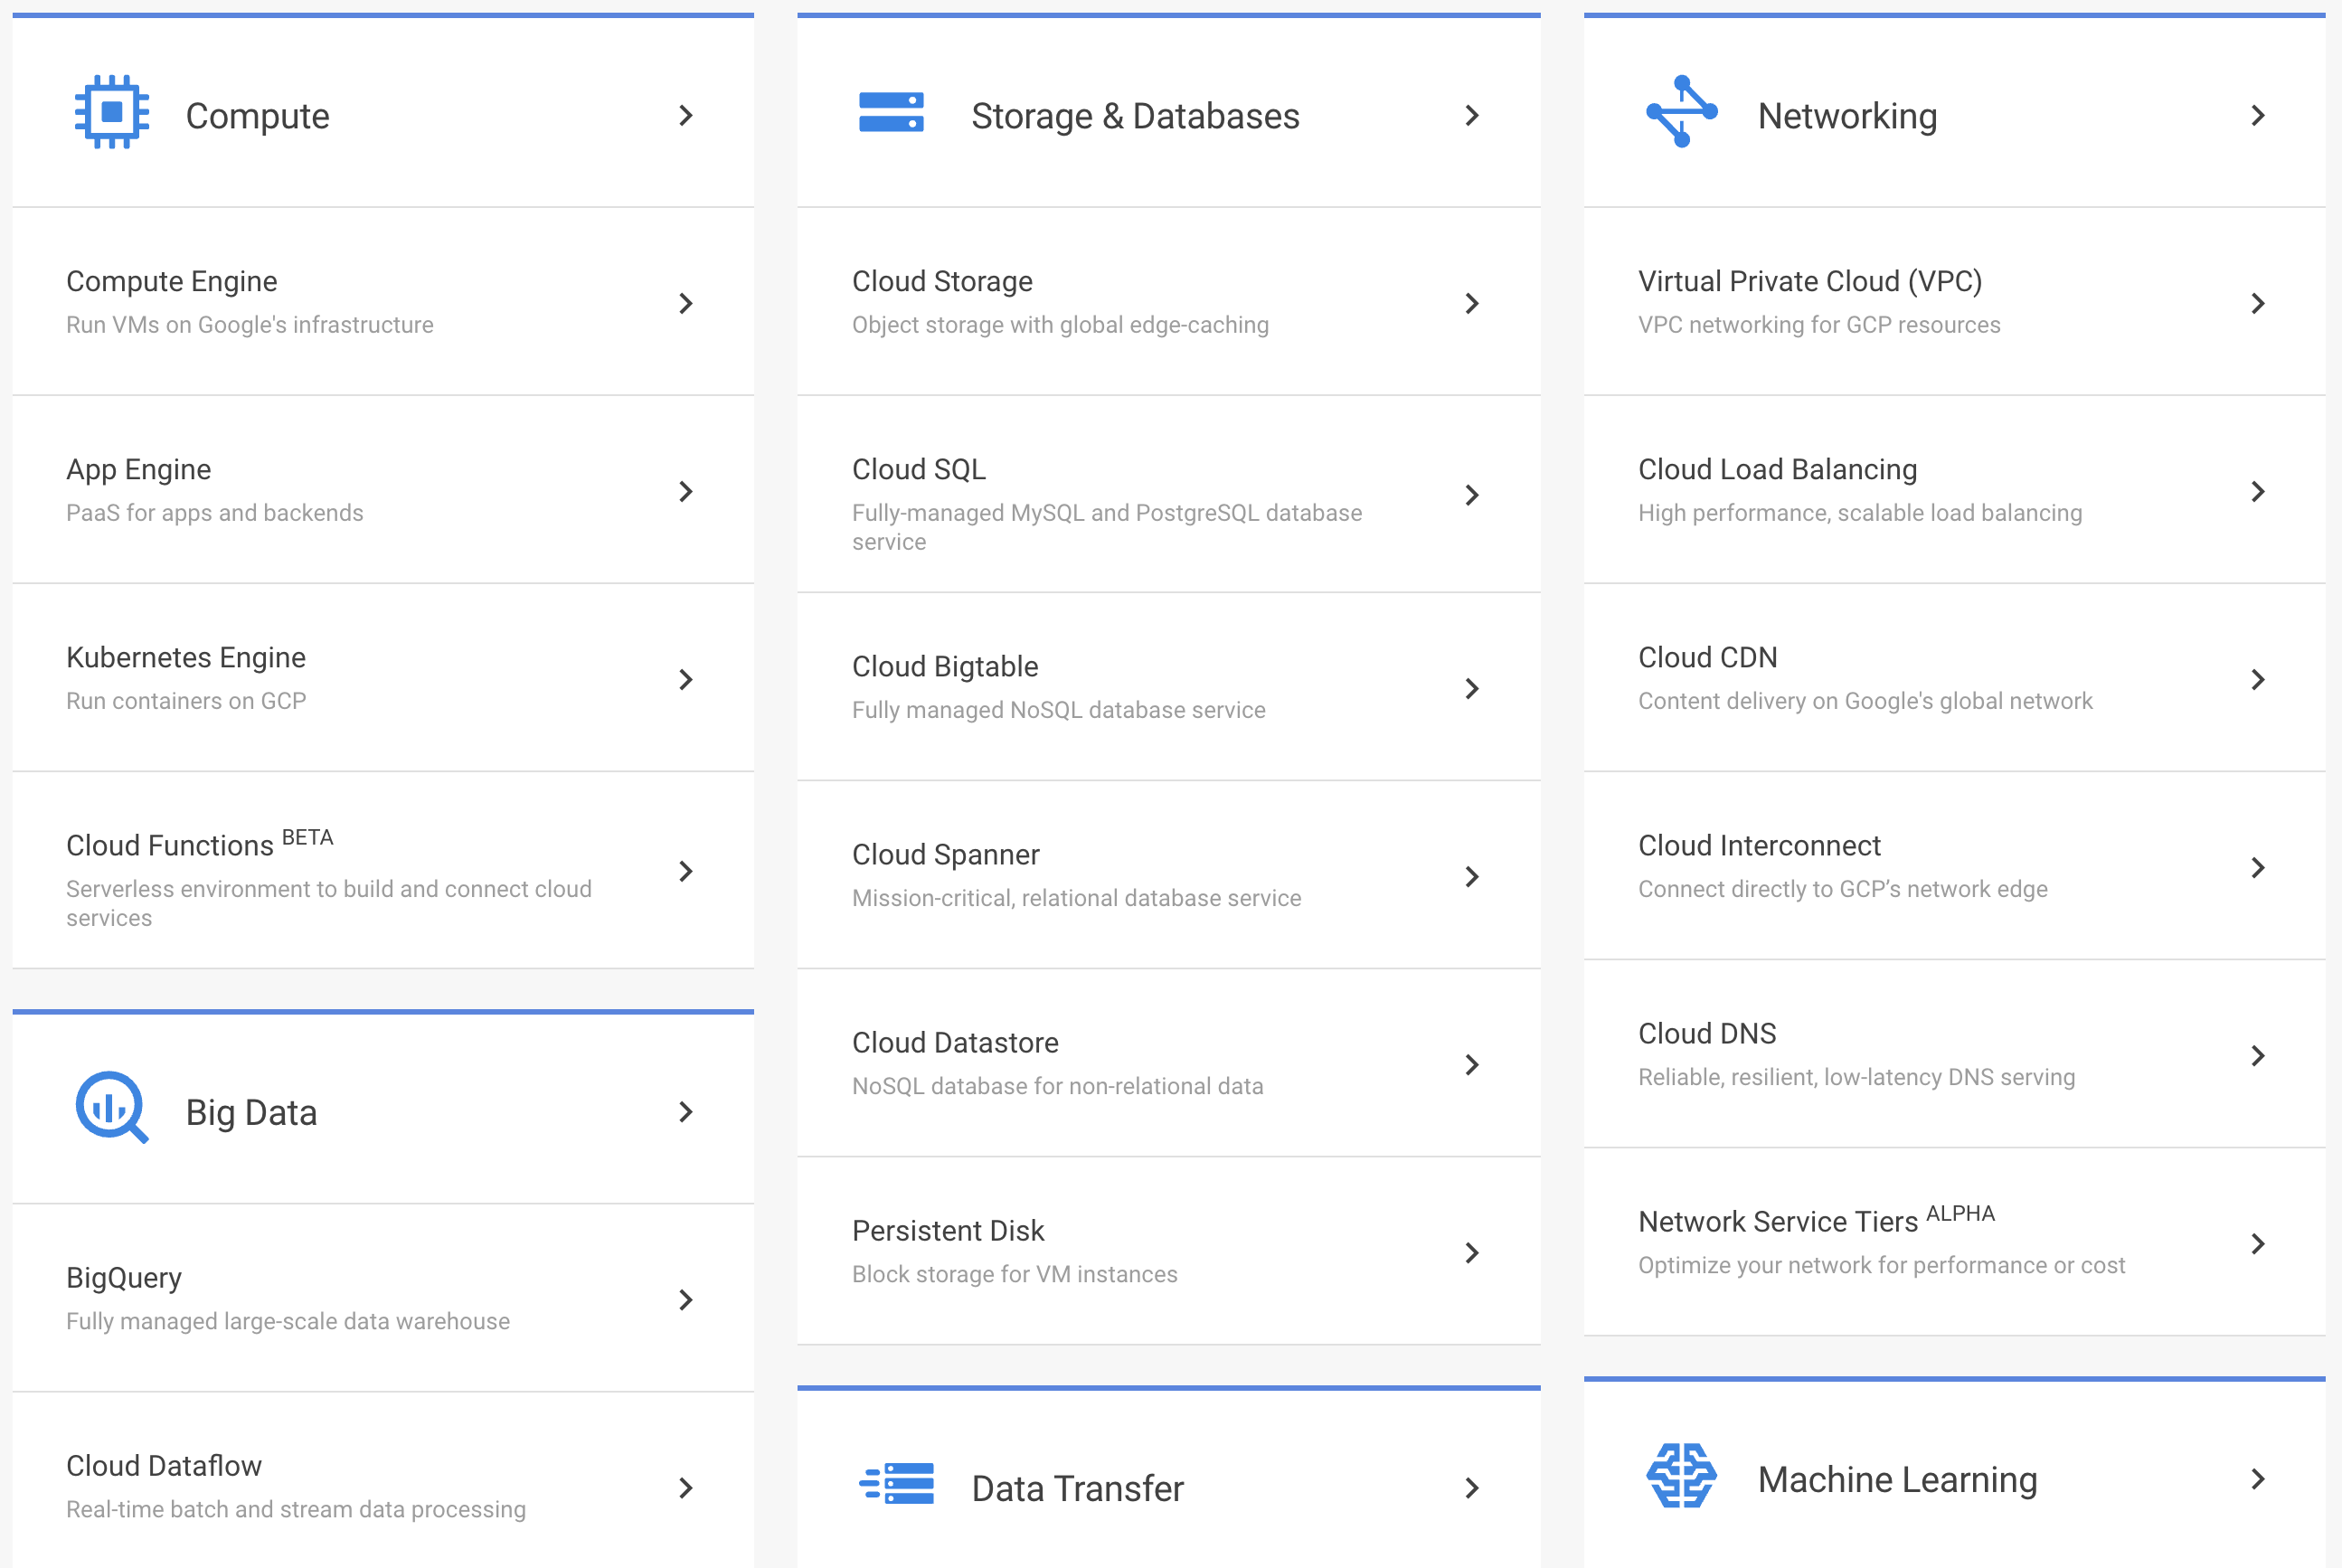
To have the freedom to install any library or tool we want, we need access to a virtual computer on GCP. This is called a virtual machine instance. Renting a virtual machine instance doesn't give us access to our own dedicated computer (cloud providers charge a lot more for renting a dedicated computer) but instead just the CPU and memory we want:

Google Compute Engine (GCE) offers reasonable pricing for high-memory instances. Here's a screenshot from the pricing in December 2017:
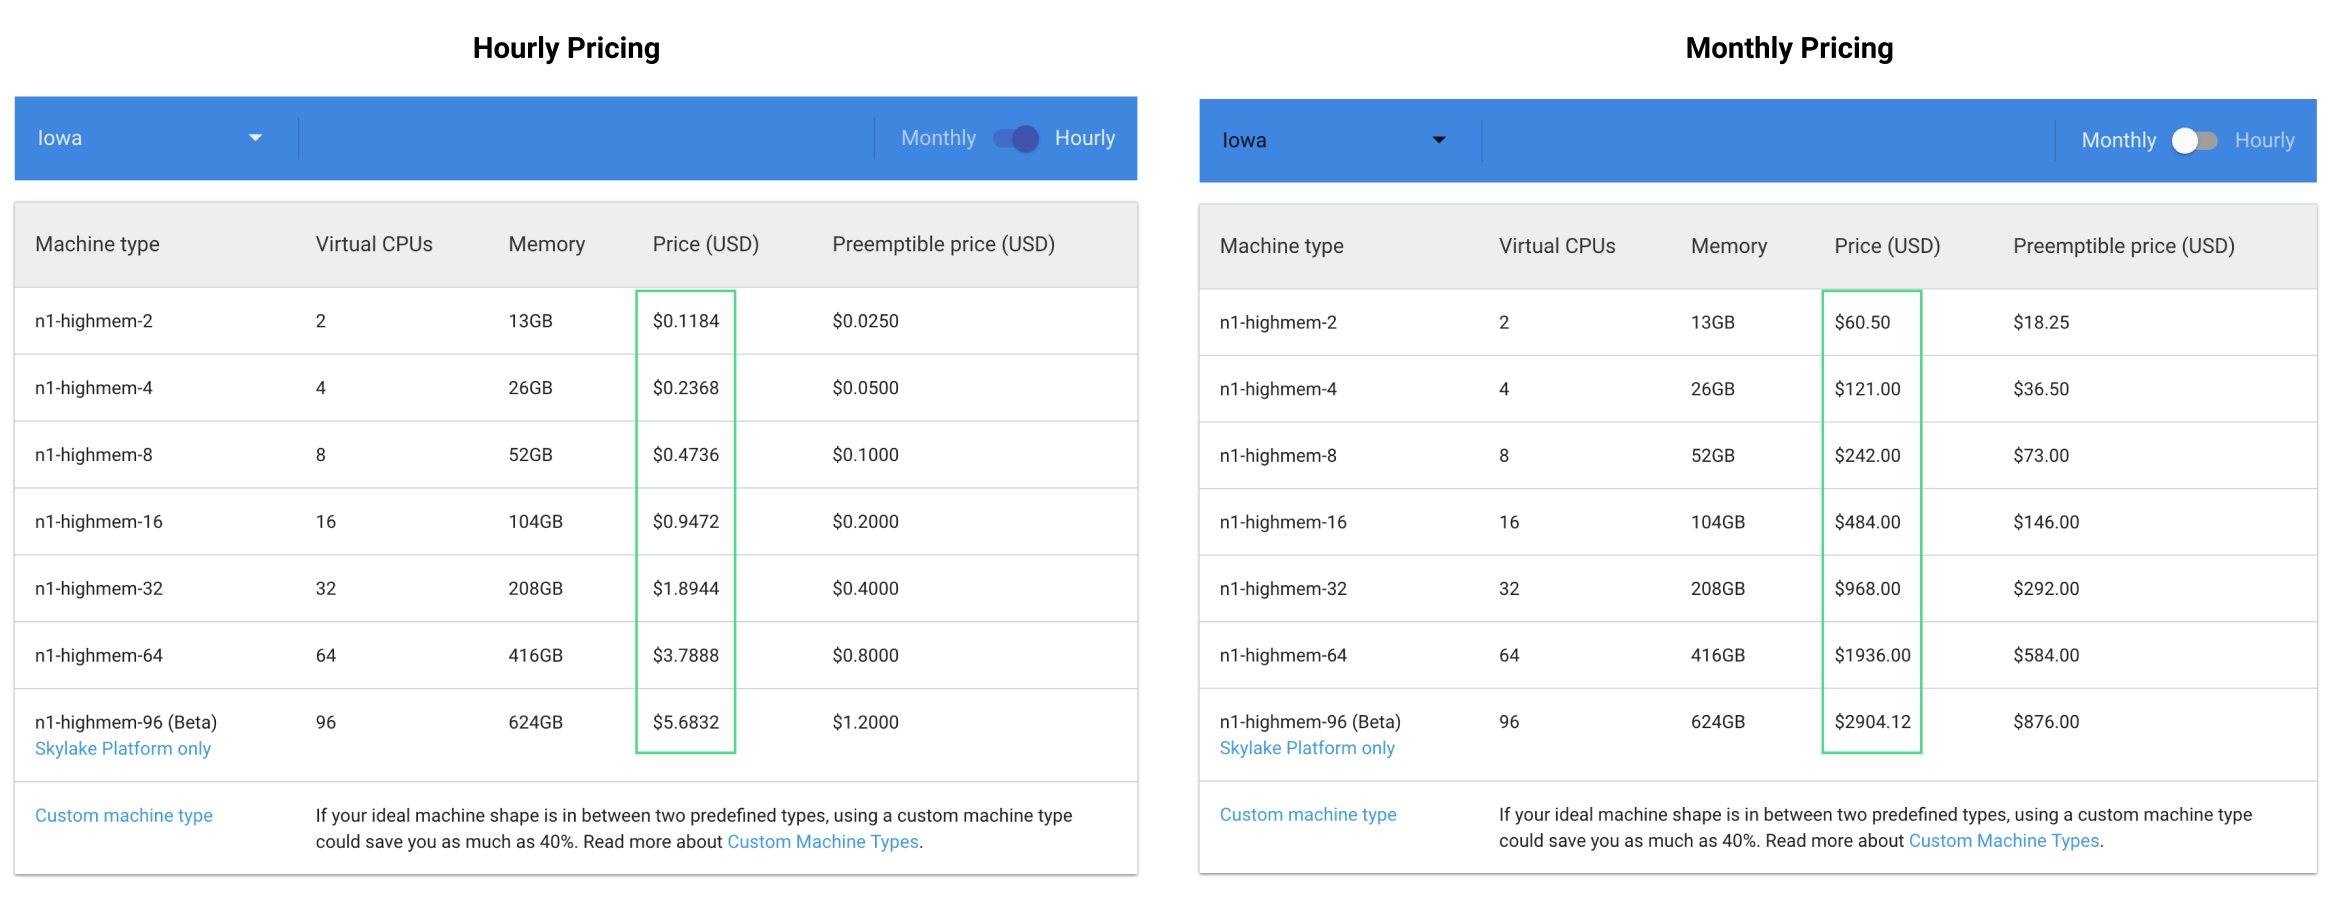
While this pricing may seem high at first, GCP has a 12 month trial with $300 of credit every month to spend on GCP products and services. You can learn more and sign up here.
This means you can rent a server with 52 gigabytes of memory and run it constantly for a full month. Because the rental cost is calculated on a per-minute basis, you could rent a much more powerful server (with 256 gigabytes of memory) for a short period of time (few hours) for a specific task.
This type of flexibility is very powerful and lets you perform large compute workflows without the overhead of buying and managing the hardware yourself.
Launching a GCE instance
Navigate to the VM instances page. You'll be asked to login with your Google credentials and create a project. Once you've done that, you'll be taken to the VM instances page:
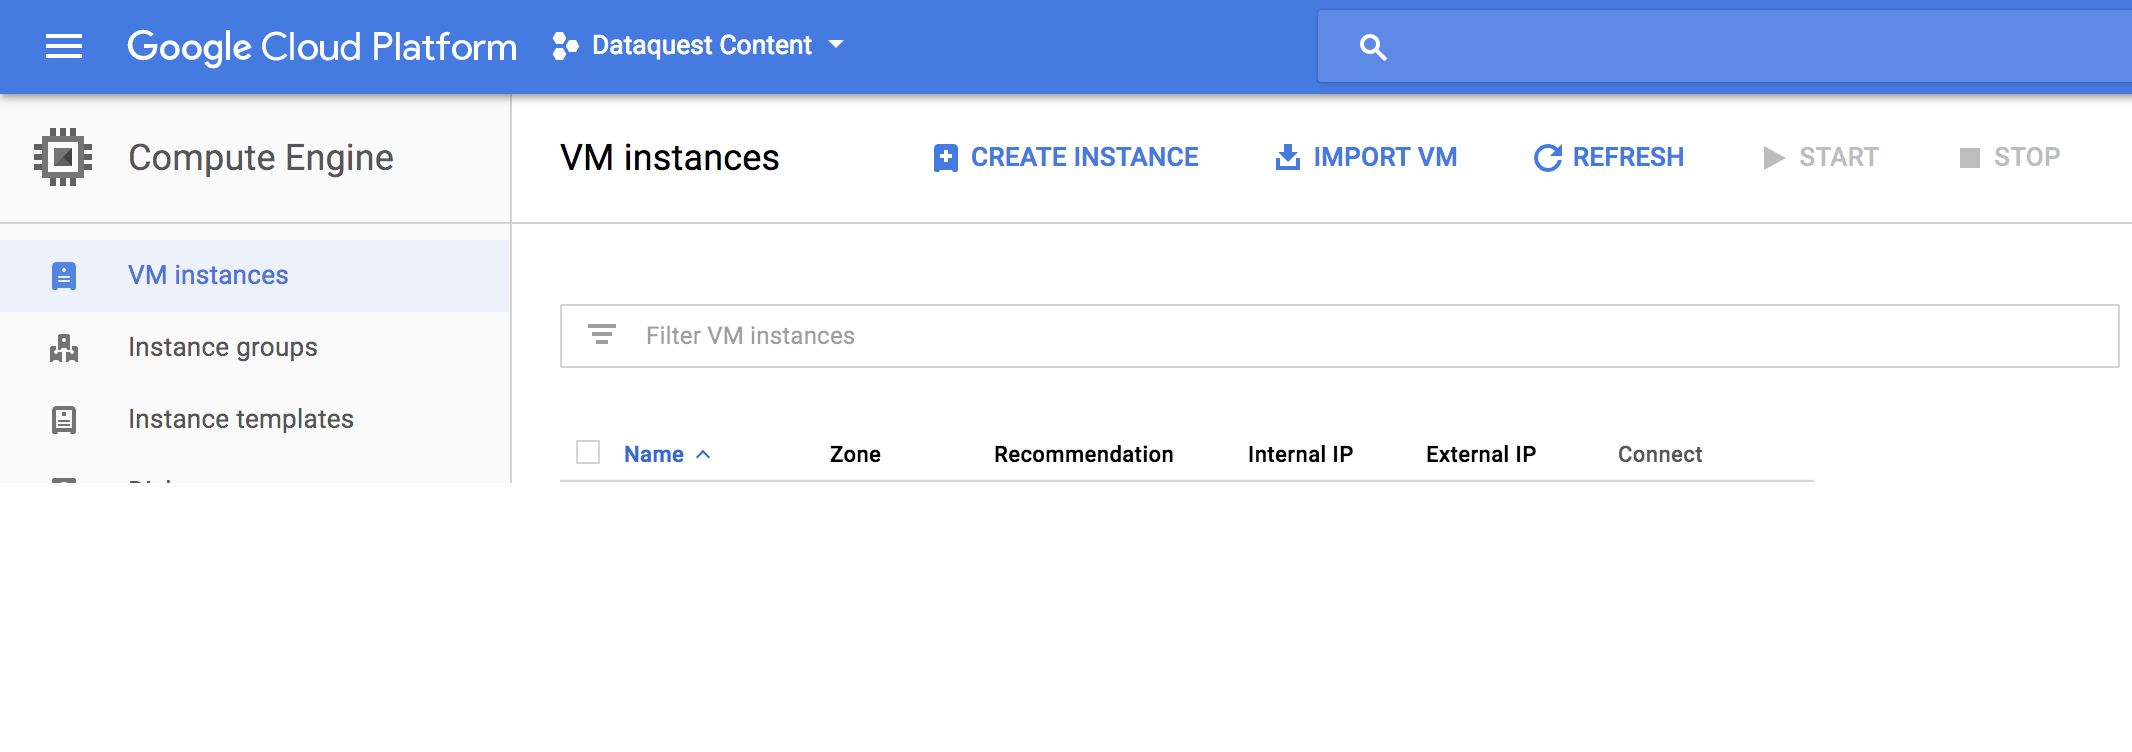
To create a new virtual instance, click Create Instance. You'll be taken to a page where you can customize different properties of the instance you want to rent:
Click Create when you're ready.
Setting up the data science environment
After you've launched a Google Compute Engine instance, you can actually launch a console right from the Google Compute Engine page:
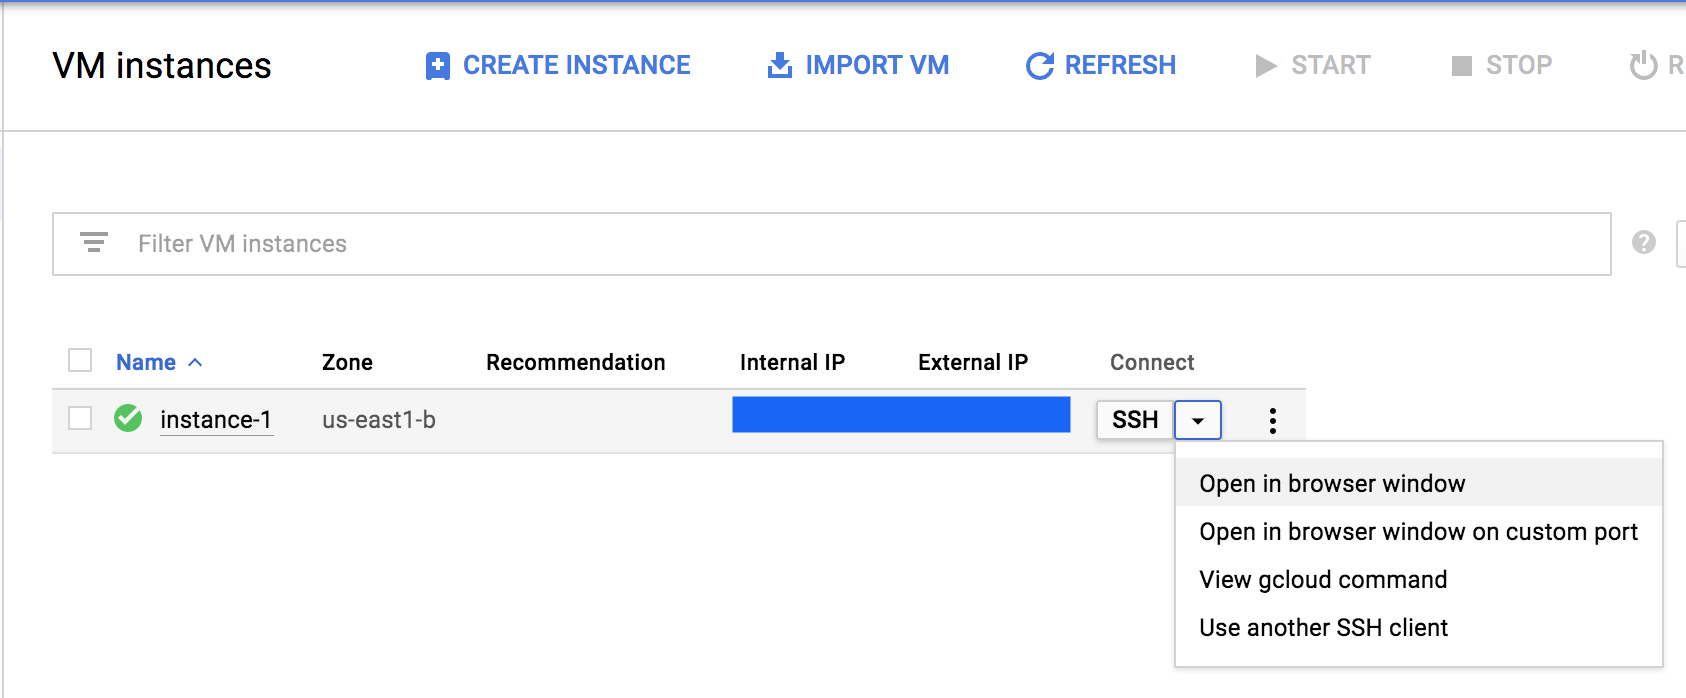
We'll use this console to setup the rest of the data science environment. If you're unfamiliar with the command line, I encourage you to check out our Command Line: Beginner and Command Line: Intermediate courses.
First, let's install anaconda. From the command line, the easiest way to download the binary setup file using curl. The unix tool curl downloads a file from a specified URL and using the -O flag writes to a file (instead of displaying the contents of the download immediately):
Once the download finishes, you can use bash to start the setup process:
There will be a few times where you'll need to type yes to accept licenses. Once the installation is finished, you need to add the conda program to your PATH. The PATH lets you specify which directories we want the operating system to search for programs.
Now that we have anaconda installed, we can create a new anaconda environment. We teach use Python 3.5 at Dataquest, so we'll be using that version here as well:
Anaconda will go ahead and install many of the popular data science libraries for you (like numpy and jupyter notebook) when you create an environment. Once the installation process is done, you can activate your environment like so:
Exposing Jupyter Notebook
Right now, the Jupyter Notebook server we have running in this instance isn't accessible to us through the web browser from our local computer. To understand why, let's think about what happens when we run Jupyter Notebook locally on our own computer -- only our local computer can access the Jupyter Notebook server (usually at localhost:8888) through the web browser.
However, if someone else on our wifi (or ethernet) network knows our IP address and what port we're running Jupyter Notebook (again, usually at 8888), they can access it through the web browser by navigating to http://OUR_IP_ADDRESS:8888.
By making two main tweaks, we can replicate this access capability for our cloud instance as well. By default, the firewall for our cloud instance is setup to prevent incoming network access. In addition, most cloud providers change our instance's IP address often (really whenever they feel like it!). This means if our instance's current IP address is 35.227.18.17, we can't rely on this staying the same in a few minutes.
We can, however, change from a dynamic IP address to a static IP address.
Setting a static IP address
To change our instance's IP address to a static one, navigate to Networking > VPC network > External IP addresses in the Google Cloud Platform menu on the left-hand side.
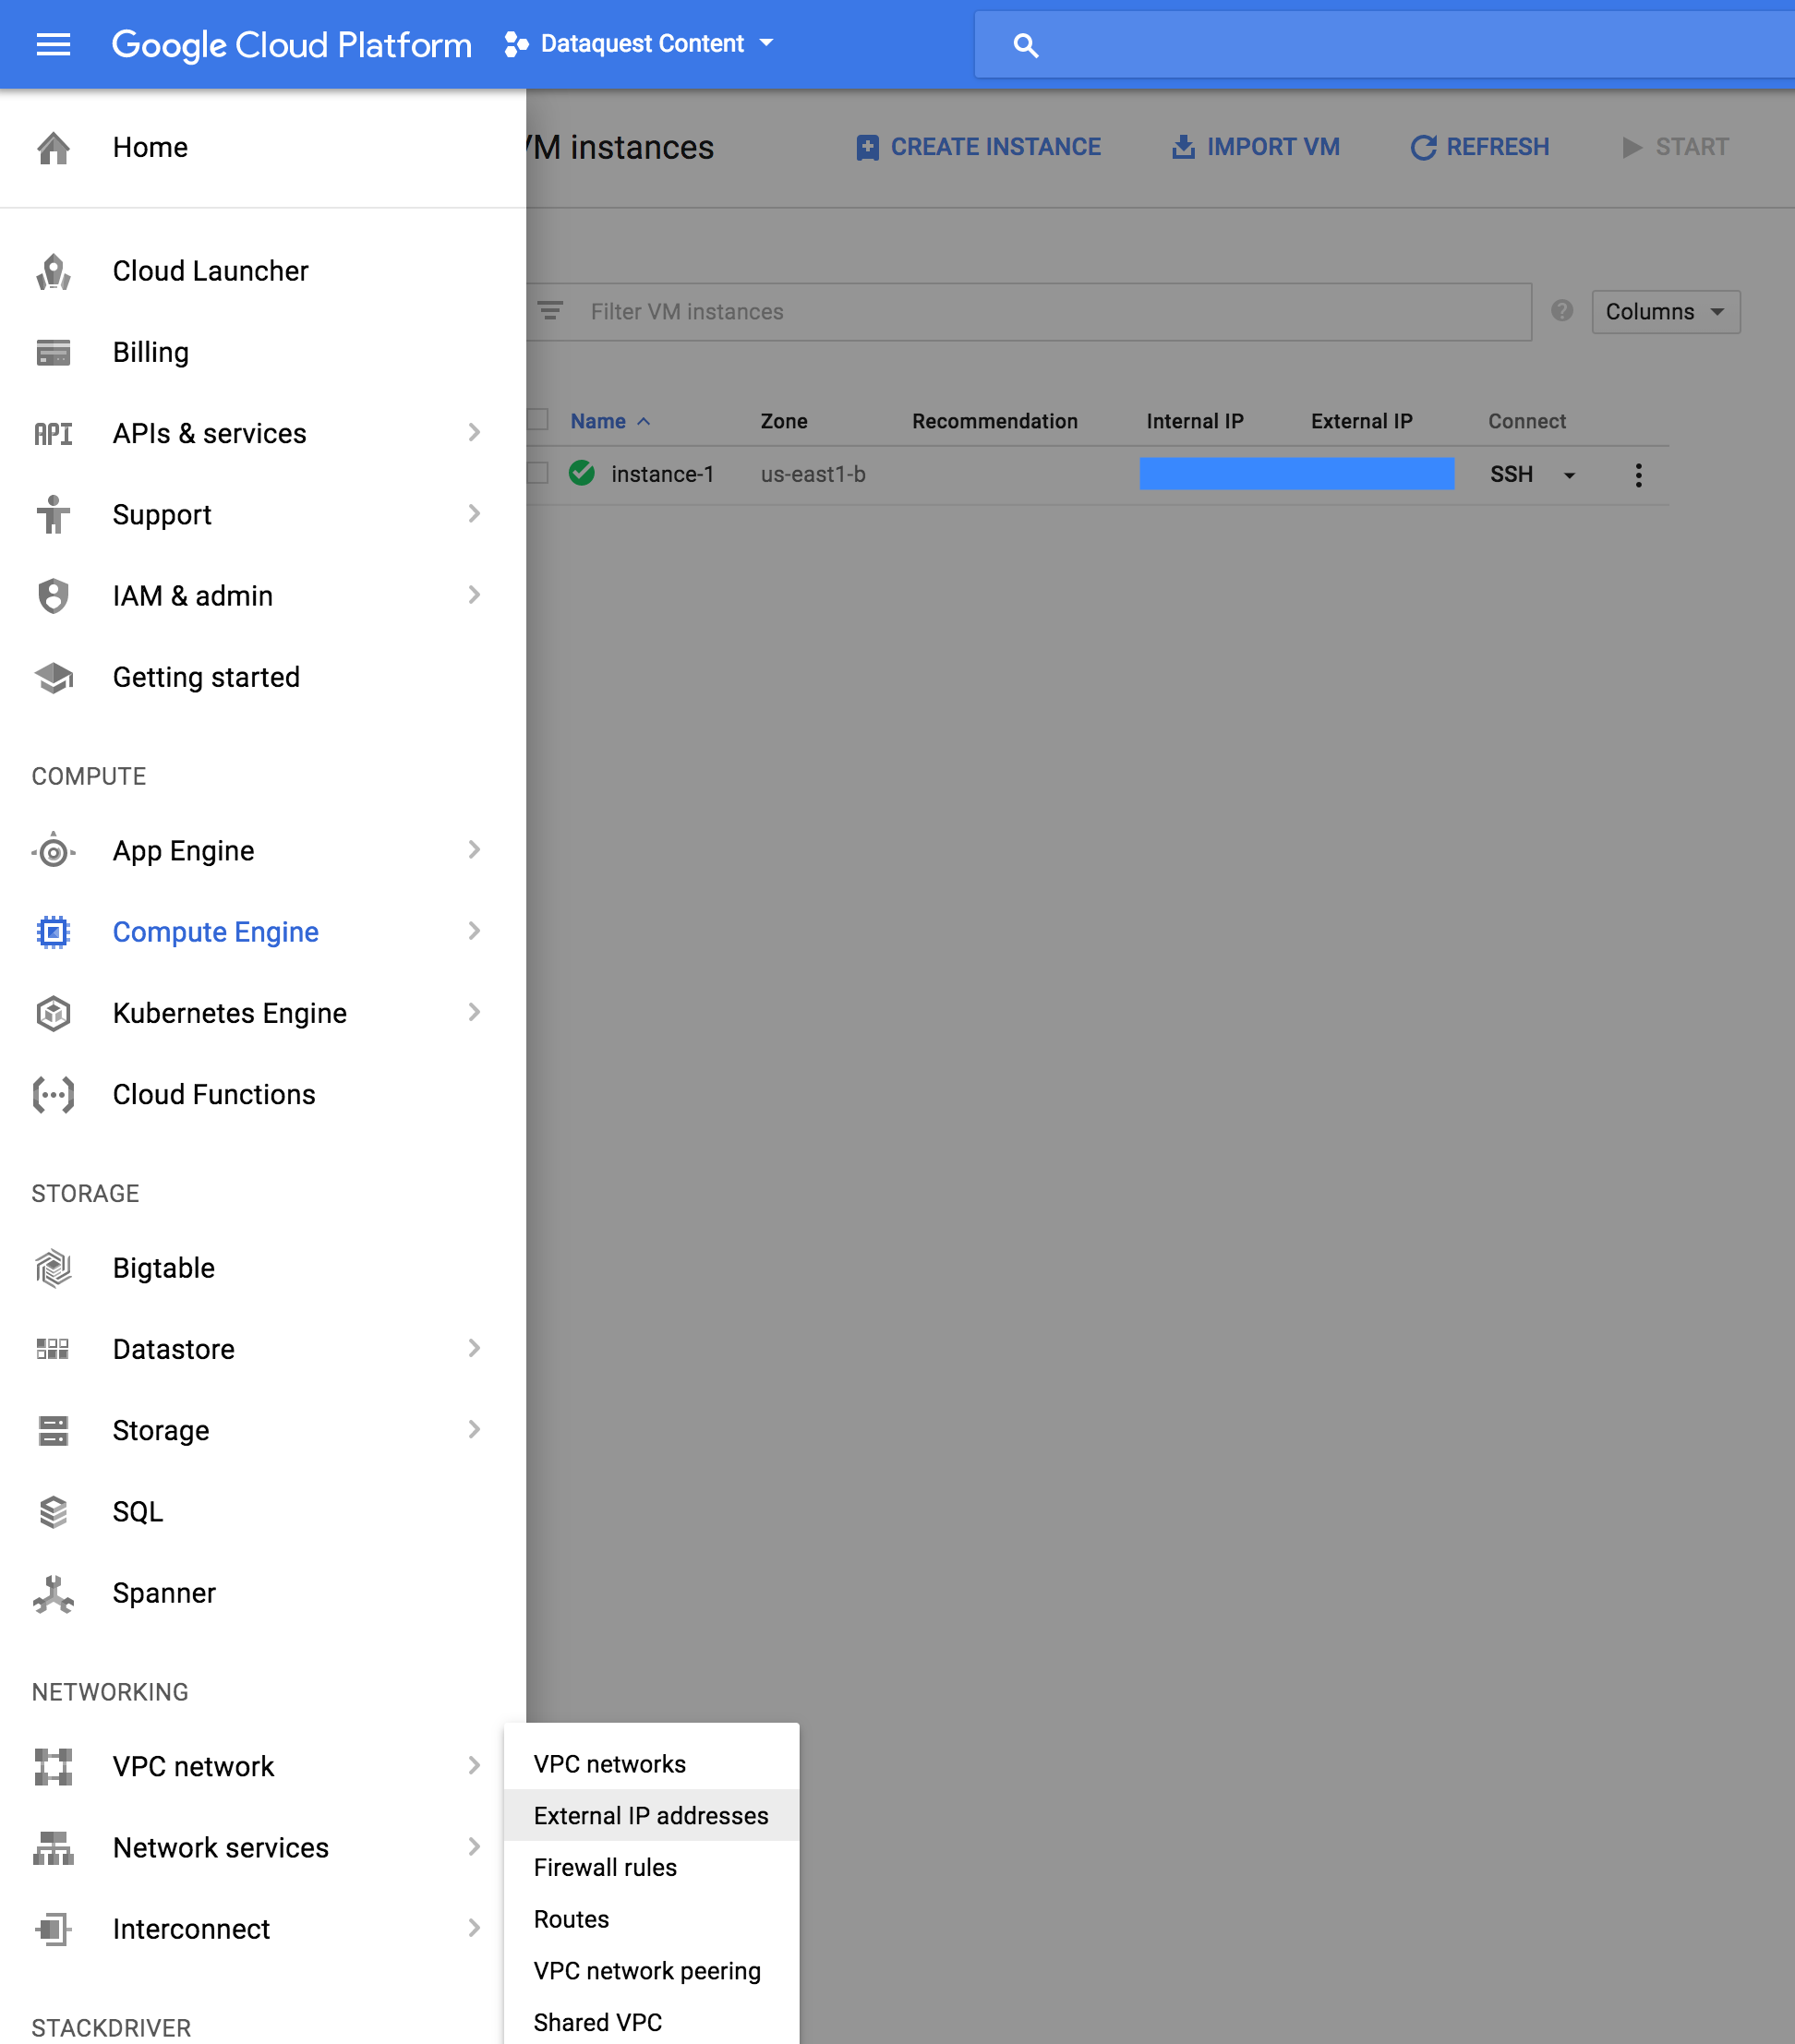
You can also jump to the page directly at this URL.
Note that Google charges a small fee if you claim a static IP address but don't have a running machine associated with the static IP address. In the Iowa region for December 2017, this cost is 1 cent per hour, as shown in the figure below:
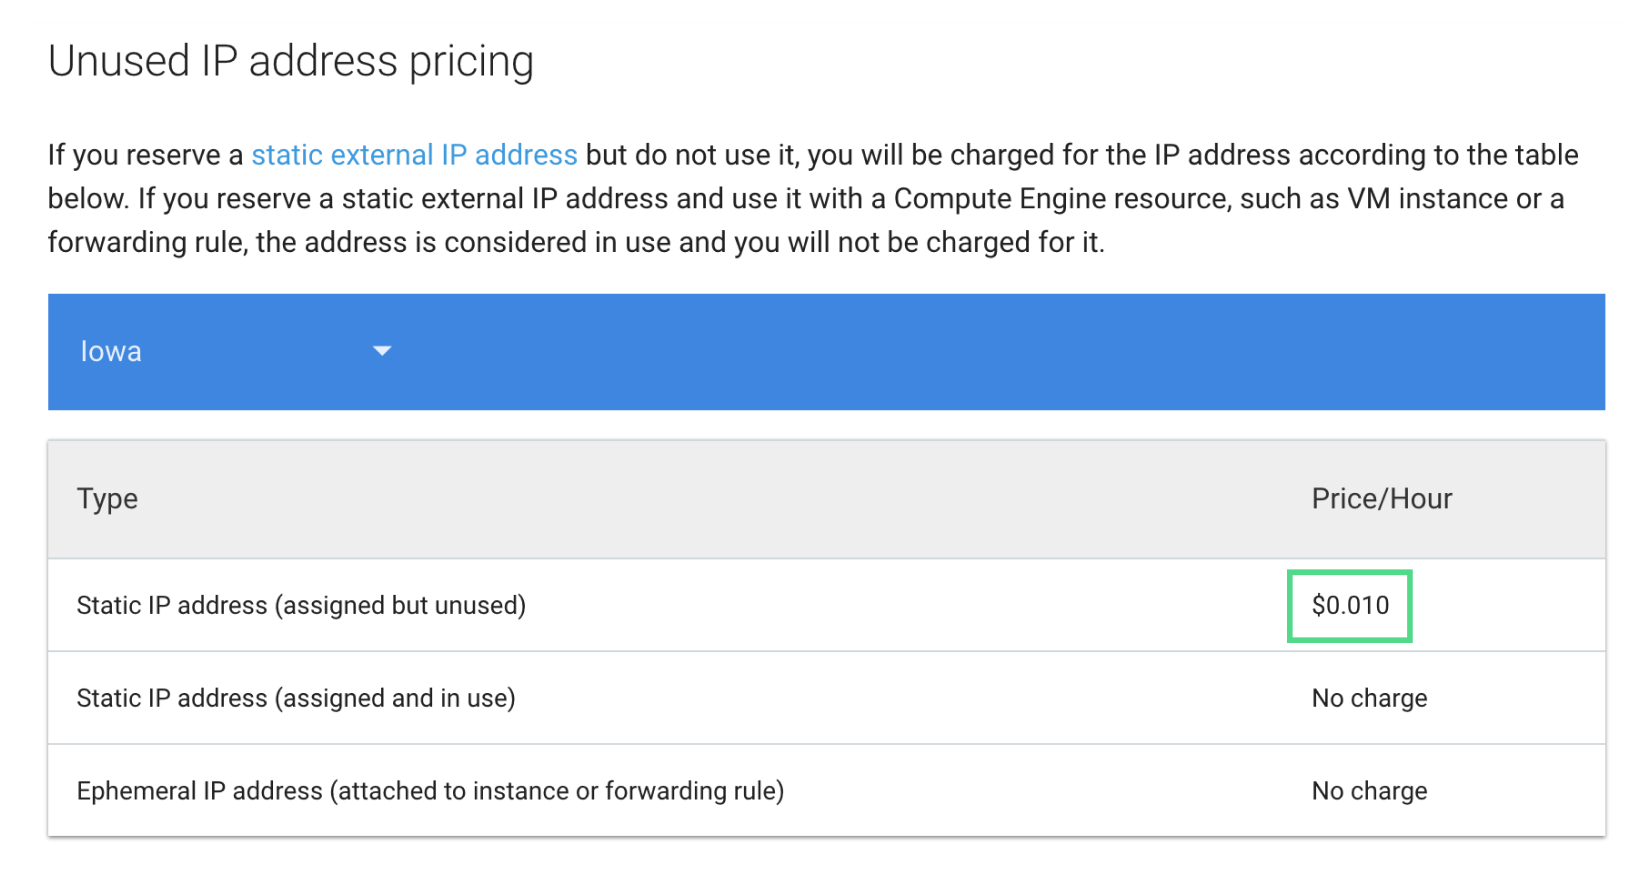
You can read more about unused static IP pricing by navigating to the GCE pricing page and scrolling down to Unused IP address pricing.
Adding firewall exceptions
Now that we have a static IP address, our local computer can talk to our cloud instance. Unfortunately, most cloud providers have a firewall in place that disables incoming access to most of the ports. Thankfully, we can manually add an exception for the port 8000 that the Jupyter Notebook server uses to accept incoming requests.
Now, let's a custom firewall rule so incoming network packets can access our server on a specific port. Navigate to the firewall rules page and click Create Firewall Rule:
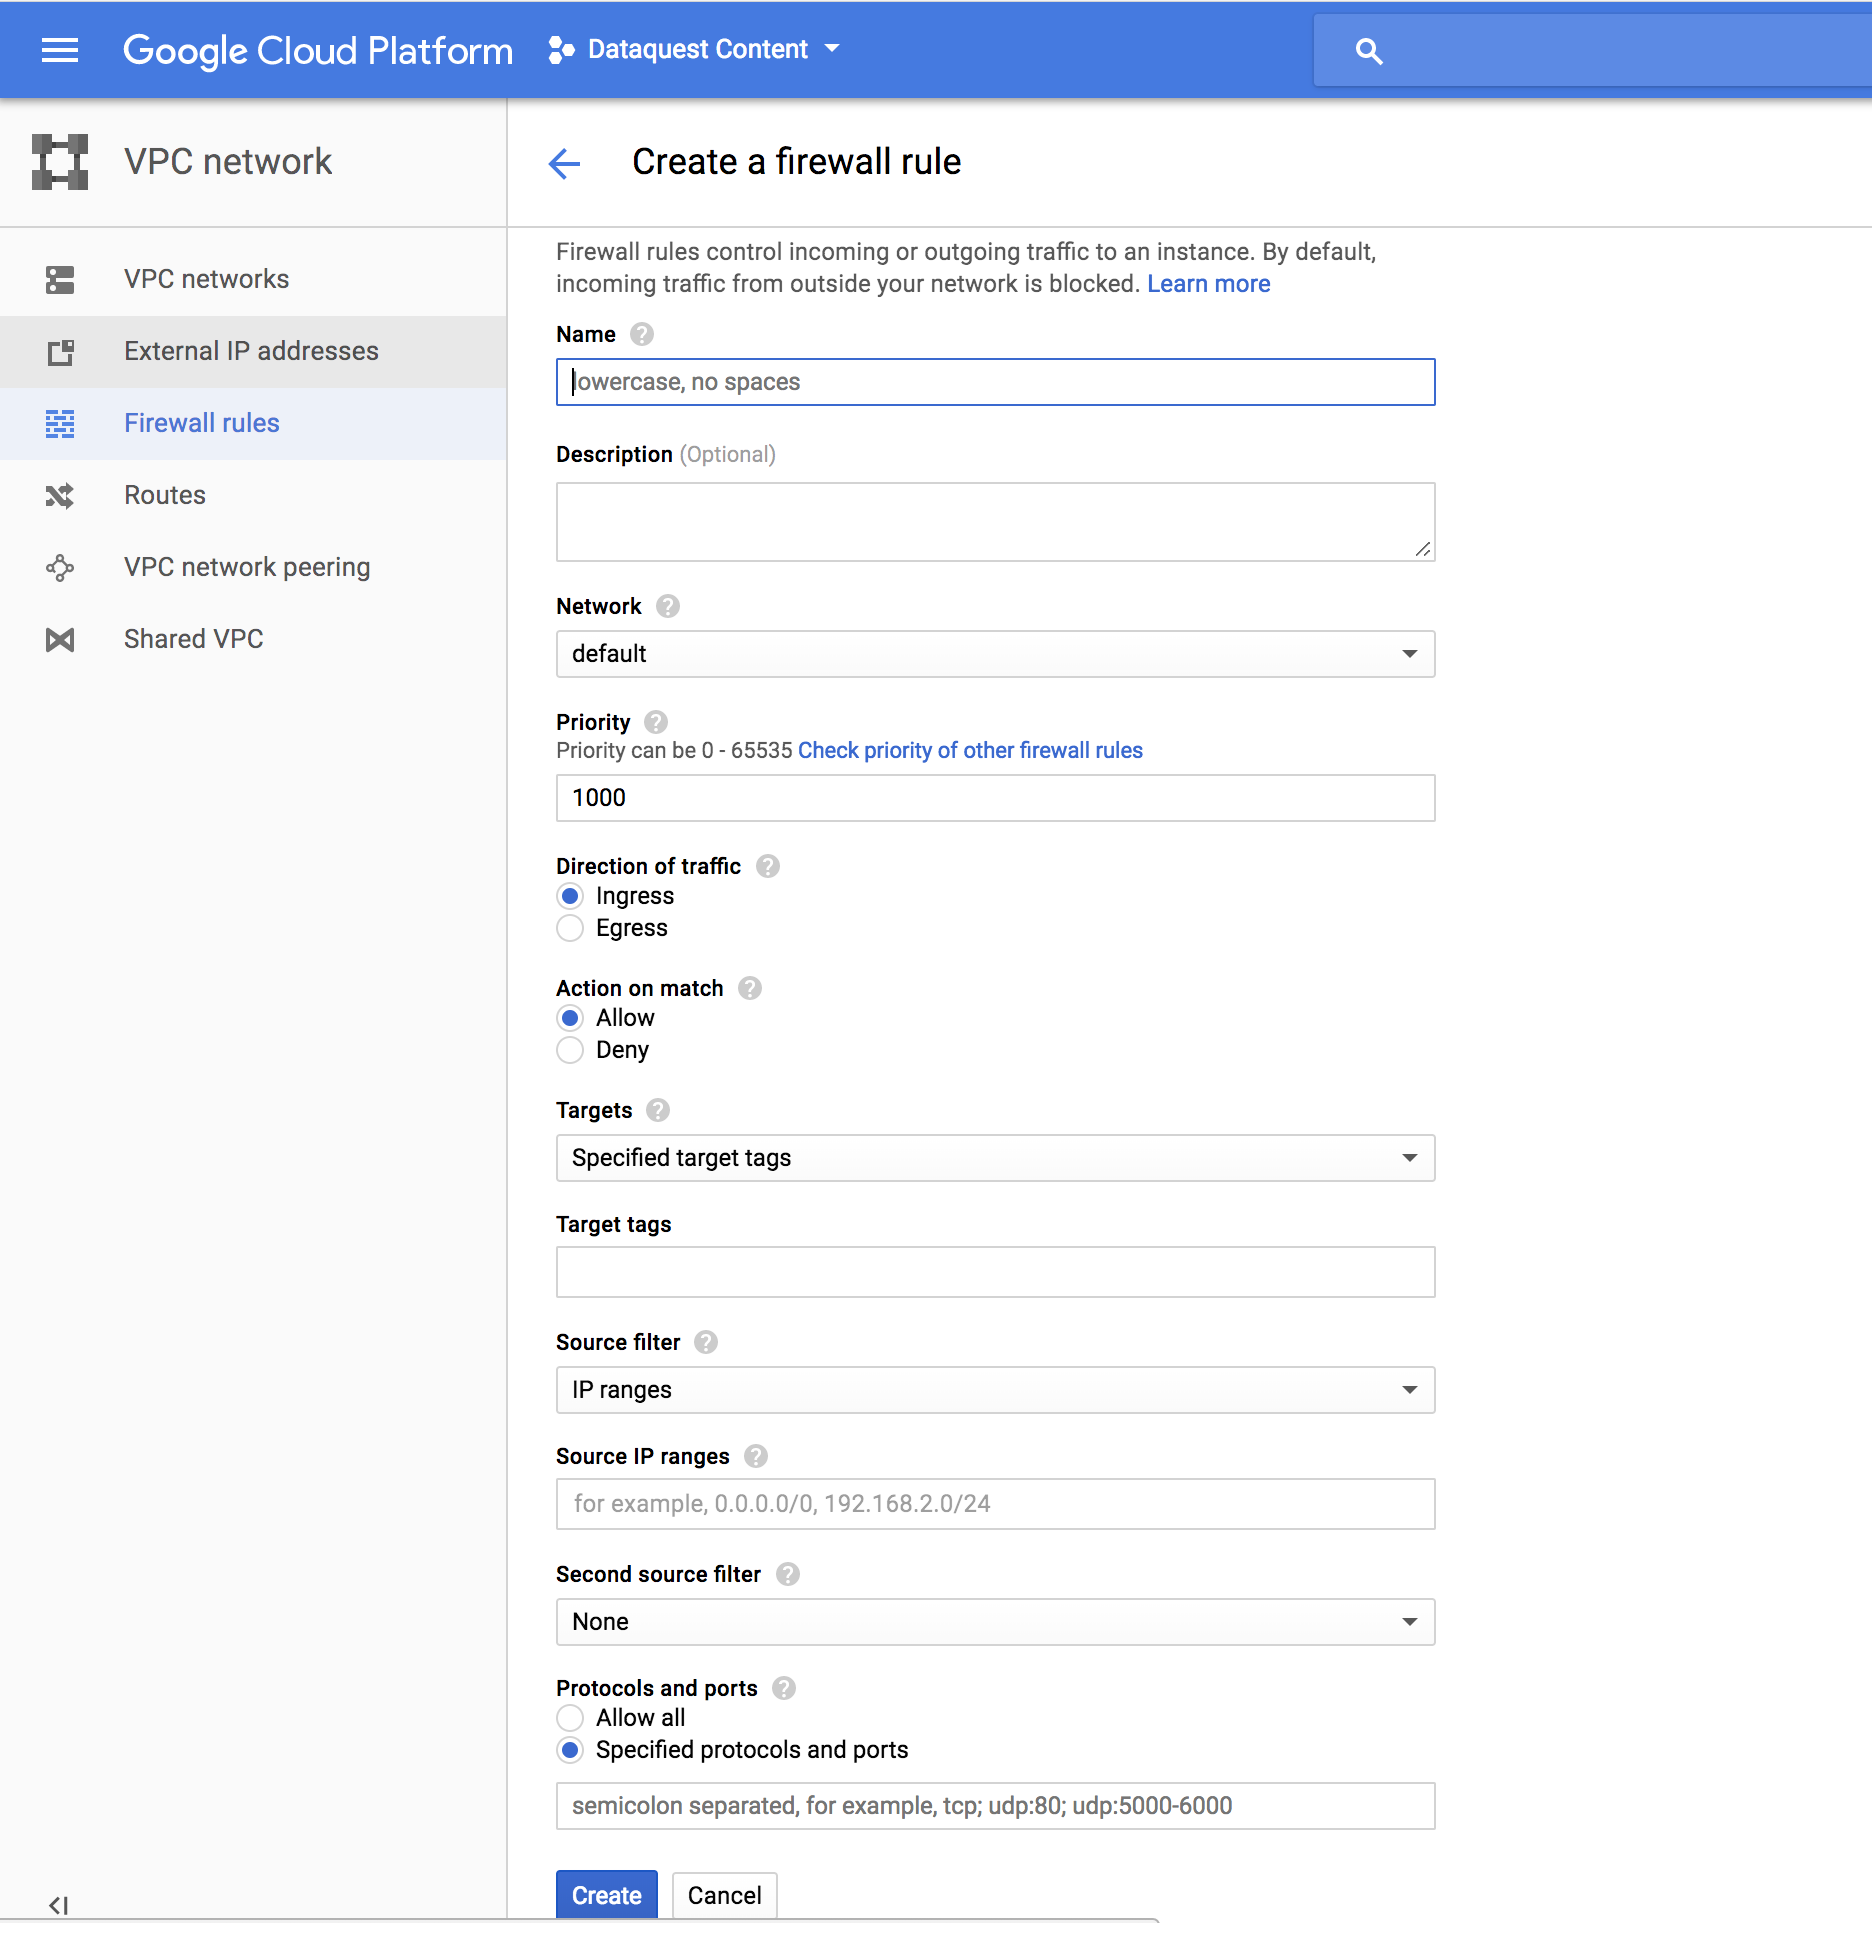
On the resulting page, fill in the following fields:
Lastly, we need to configure Jupyter Notebook to use the TCP port we specified earlier for the firewall.
Configuring the port Jupyter Notebook listens to
Run this command to generate a config file.
Now that we have everything setup, let's start Jupyter Notebook with the following flags:
On your local computer, navigate to the URL http://YOUR_STATIC_IP_ADDRESS:8000 and you'll see the welcoming Jupyter Notebook landing page!
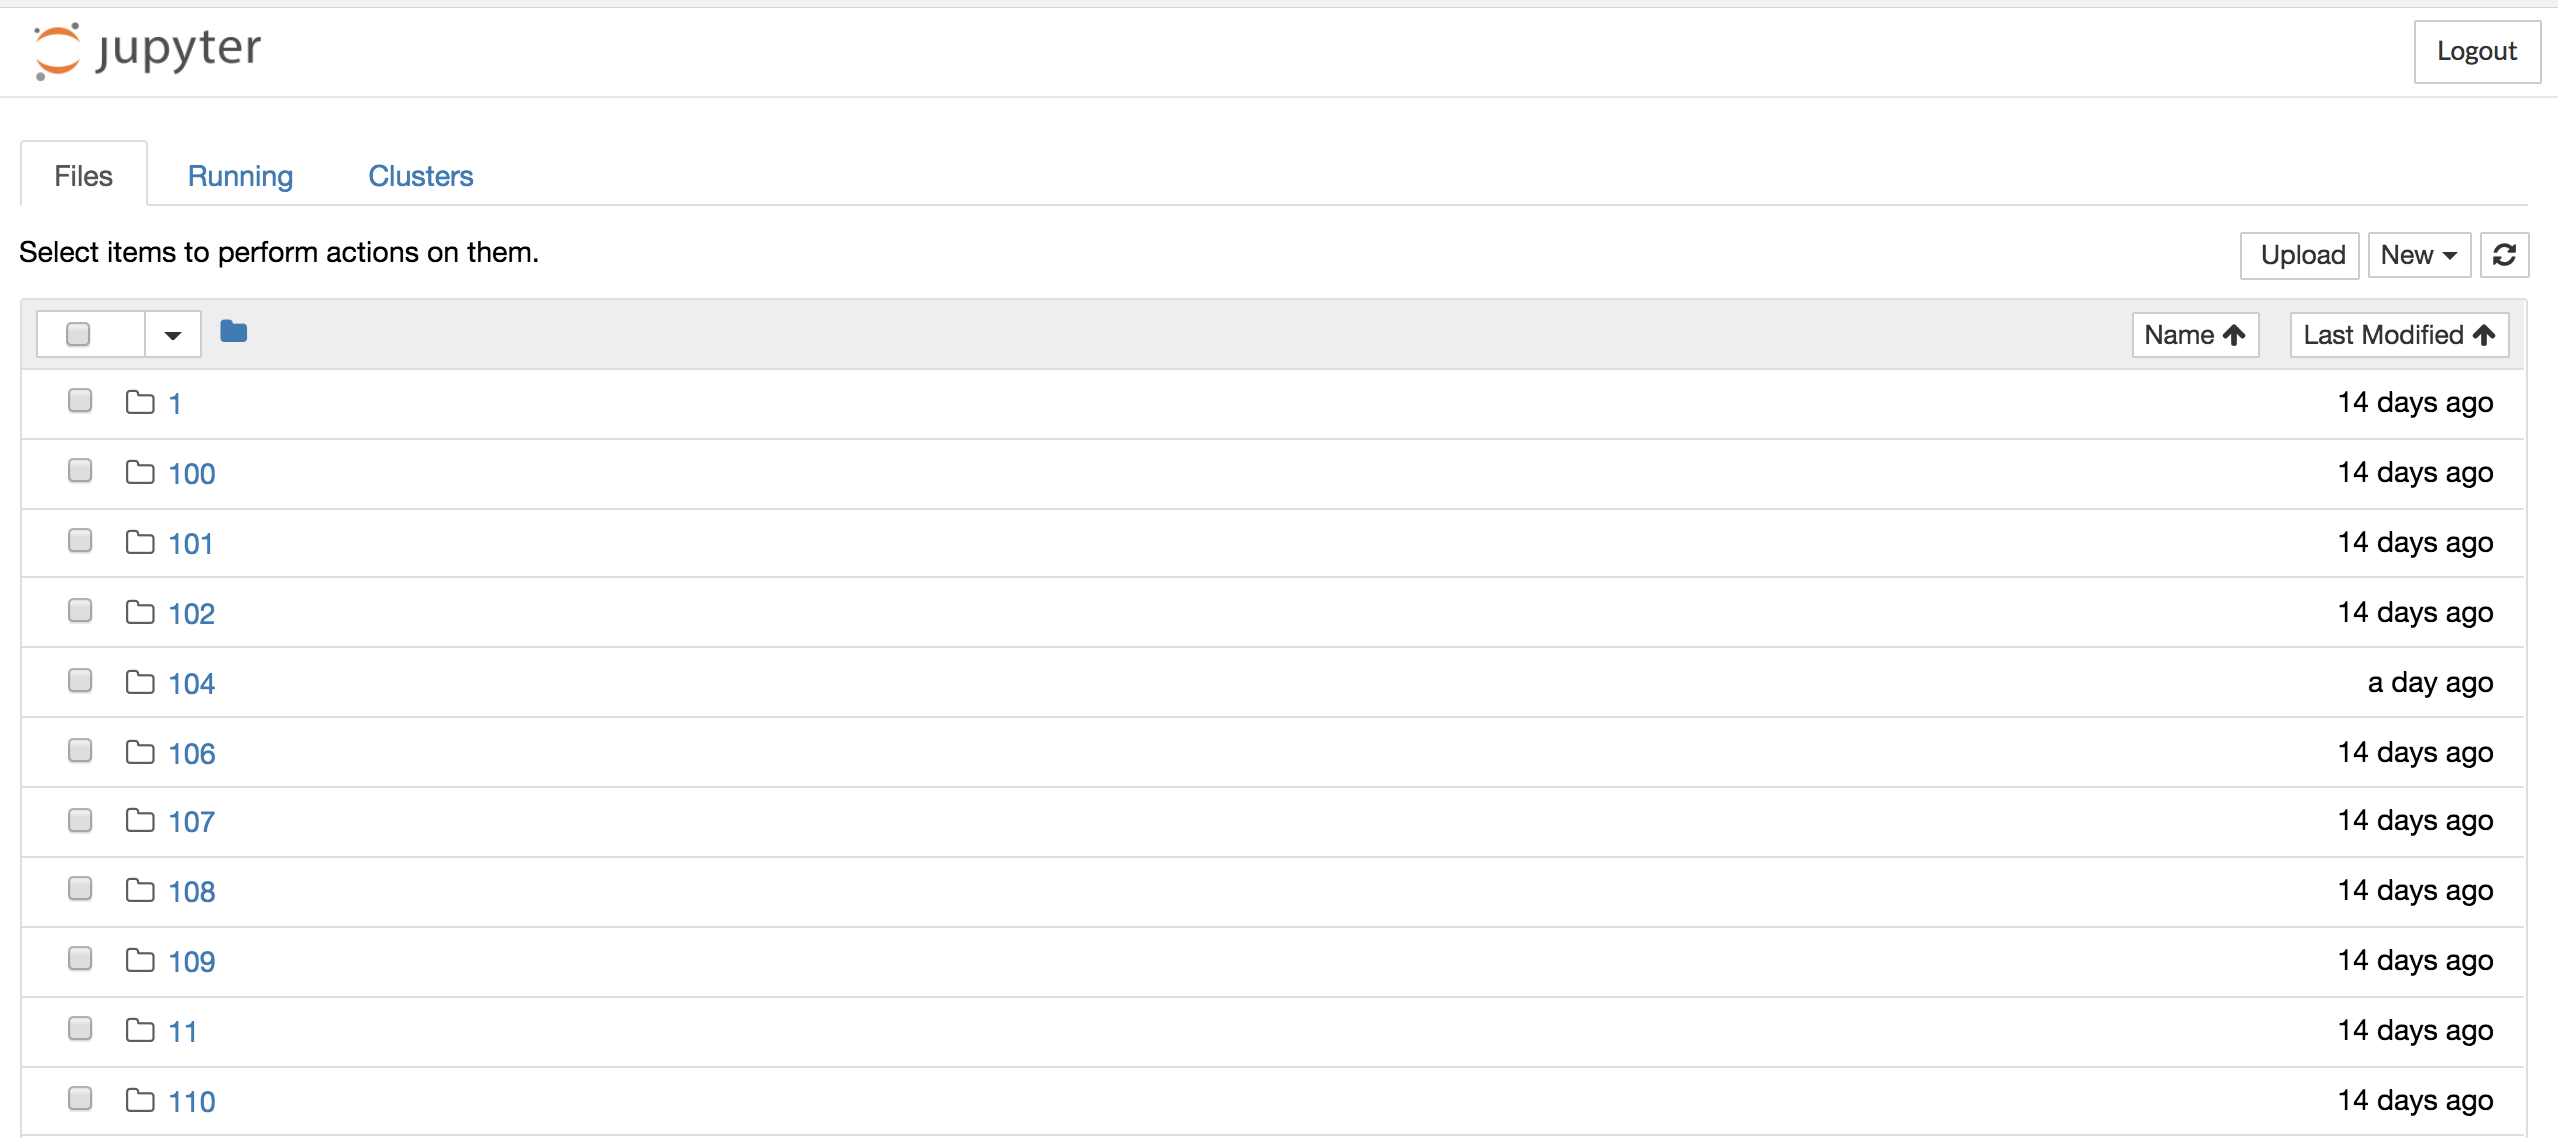
You can even upload files directly into your cloud Jupyter Notebook, using the Upload button.
Next steps
Congratulations! You've just set up your first environment on Google Cloud! Here are some next steps you may want to consider:

WorksHub
Jobs
Locations
Articles
Ground Floor, Verse Building, 18 Brunswick Place, London, N1 6DZ
108 E 16th Street, New York, NY 10003
Subscribe to our newsletter
Join over 111,000 others and get access to exclusive content, job opportunities and more!